







Location
San Diego's Flexible Stone Veneer Specialist
EXPERTISE SUPPORTS
EXTRAORDINARY SPACES

Installation Guides

Start with the essentials, then select the guide for your stone.

Before installation

Inspect sheets
Flat, clean & dry
Acclimate materials
Test products
Read before starting

Select A Guide To View The Steps Online

Non-Translucent

Flexible Stone Installation

For standard antenoc exterior fumiture and wet-ares applications
Prepare
Measure
Adhere
Bond
Finish
VIEW INSTALLATION STEPS
Button Arrow
Opens the step by step guide on this page
VIEW GUIDE PDF
Translucent

Backlit Stone Installation

For iluminated applications using LEDs and translucent supports
Engineer
Plan
Adhere
inspect
Commission
VIEW INSTALLATION STEPS
Button Arrow
Opens the step by step guide on this page
VIEW GUIDE PDF

Non-Translucent Stone

For standard antenoc exterior fumiture and wet-ares applications

Backlit Stone Installation

For iluminated applications using LEDs and translucent supports
Non-Translucent Installation Guide

Stone Veneer Installation Guide

Standard Interior & Exterior Applications
Five phases carry you from surface prep to the final seal. For backlit or translucent applications, see the Translucent Stone Veneer Installation Guide instead.
01

PREPARE SURFACE

Inspect the Sheets on Delivery

  • Inspect every sheet for dimensions, surface condition, colour, and veining before cutting or bonding it.
  • Arrange adjoining sheets together and confirm their sequence before installation, so colour and veining flow the way you want.
  • Slight flaking of the stone surface is normal during unboxing and installation.
  • Treat slight flaking, minor edge chipping, and natural variation in colour or texture as characteristics of genuine stone, not manufacturing defects.

Inspecting on Delivery
  • Report any genuine defect within 14 days of delivery.
  • Once a sheet has been cut, bonded, or otherwise processed, it's no longer eligible for a quality claim.

Acclimate & Flatten the Sheets

  • Lay rolled sheets flat for up to 48 hours, or until they regain their natural shape.
  • Keep the installation area above 50°F (10°C), and within the adhesive manufacturer's approved temperature range.
  • If you need to speed up flattening, apply gentle, continuously moving heat to the backing only — never let the stone or backing overheat.

Pre-Seal to Protect the Surface

  • Contouro recommends applying one coat of sealer to the sheets before installation — separate from the final protective seal applied after curing — to help protect the surface from fingerprints and handling marks.
  • Wear clean gloves throughout cutting, handling, and installation to avoid transferring oils or fingerprints onto the stone face.

Prepare the Substrate

  • Confirm the substrate is flat, solid, dry, fully cured, and free of dust, grease, wax, loose paint, or debris.
  • Repair cracks, holes, loose areas, and visible unevenness first — the thin veneer will telegraph irregularities in the surface below.
  • Confirm the substrate, any primer, and your selected adhesive are all compatible before proceeding.

Gather Essential Tools

  • Bring together accurate measuring and levelling tools, a suitable stone-cutting saw, painter's tape, the approved adhesive and its specified applicator, and a clean pressure roller.
  • Wear respiratory protection, safety goggles, gloves, and hearing protection whenever you're cutting stone.
02

MEASURE & CUT

Plan the Layout

  • Measure the full installation area and establish level and plumb reference lines.
  • Number the sheets in sequence to control how colour and veining flow across the finished surface.
  • Plan joints, corners, trim, outlets, and edge terminations before you cut anything.

Measure and Mark

  • Measure each position individually — walls and cabinetry are rarely perfectly square.
  • Mark dimensions and cut lines on the back of the sheet only, and double-check them before cutting.
  • Dry-fit complex pieces and penetrations before applying any adhesive.

Cut the Sheets Safely

  • Support the sheet fully, and cut with a circular or track saw fitted with a continuous-rim diamond blade or a 60-tooth carbide-tipped blade.
  • For curves or detailed cut-outs, use a jigsaw, oscillating multitool, CNC router, or waterjet, and test the method on an offcut first.
Cutting Safety
  • Cutting natural stone creates fine dust — wear a P2 mask, safety goggles, gloves, and hearing protection throughout.
03

APPLY ADHESIVE

Select and Test the Adhesive

  • Choose an adhesive rated for your actual substrate and conditions, including moisture, exterior exposure, or elevated temperature where relevant.
  • Test the adhesive on an offcut and a representative piece of substrate, and let it cure fully before checking adhesion, staining, or distortion.
  • Check the manufacturer's current instructions for compatibility, applicator type, coverage, open time, and curing requirements.

Mask the Edges

  • Mask panel edges with standard painter's tape — avoid high-tack tape, which can damage the stone face on removal.
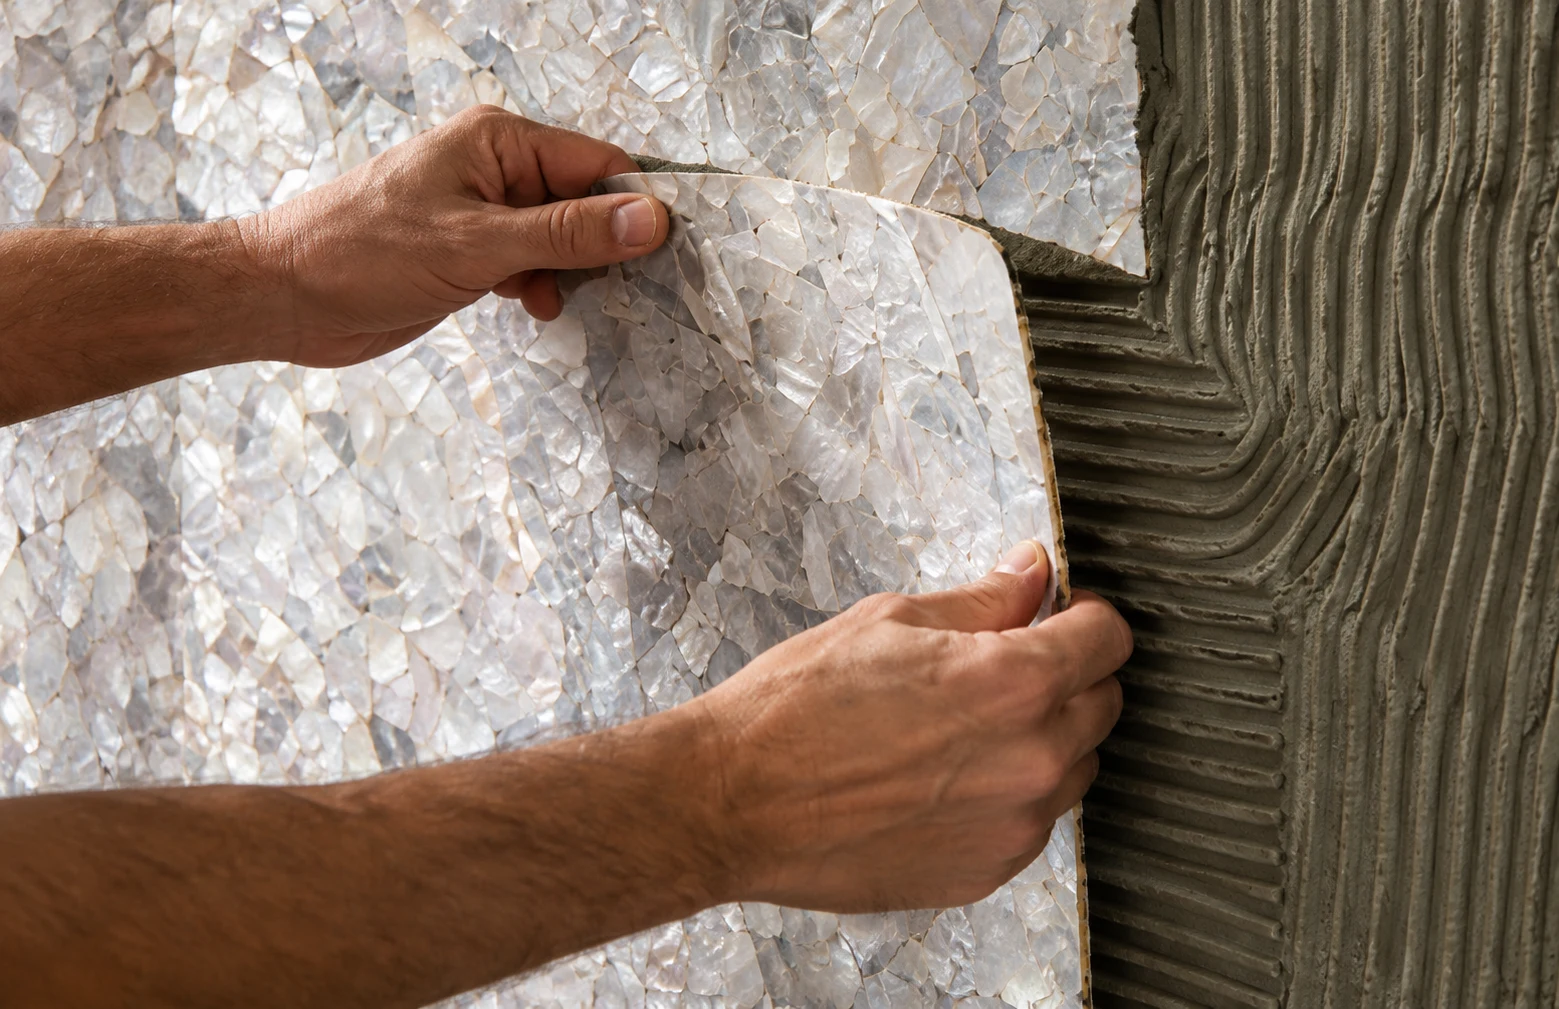
  • Leave a narrow 10mm gap free of adhesive at butt joints to stop squeeze-out from reaching the stone face.
  • Remove tape promptly once bonding or joint finishing is complete, before the adhesive or joint material fully cures.

Apply the Adhesive

  • Spread the adhesive evenly across the substrate or sheet backing, following the manufacturer's instructions.
  • Keep coverage full and consistent — avoid dry spots, excess buildup, or adhesive squeezing into visible joints.
  • Place the sheet before the adhesive skins over. A B3 notched trowel is typical, but always use the applicator your adhesive manufacturer specifies.
  • For translucent stone, switch to a light-permeable adhesive instead.
Adhesive Selection
  • Always check the adhesive manufacturer's current data sheet before use.
04

PRESS & BOND

Position and Roll the Sheet

  • Confirm the sheet's number and orientation, position it from your reference line, and check it with a spirit or laser level.
  • Press from the centre toward all edges, then roll the full surface in overlapping passes to remove trapped air and get full contact.
  • You can reposition a sheet while the adhesive is still within its open time — leave it alone once it starts to grip.
  • Remove any adhesive squeeze-out right away, using a method the adhesive manufacturer approves.
Corner & Joint Options
  • Choose from metal trim (our usual recommendation), an edge-to-edge join finished with colour-matched stone wax after curing, a workshop-prepared 45° mitre cut, or — since Contouro is flexible — a wrapped corner with no joint at all, where the stone and radius allow it.
  • Expect joints to remain slightly perceptible; natural stone varies from sheet to sheet.

Apply Optional Grout or Silicone

  • Mask the stone edges and place grout directly into the joint with a grout gun, rather than spreading it across the stone face.
  • Remove excess grout and masking tape before it skins over or fully cures.
  • Use a tested, neutral-cure natural stone silicone only — acetate-cure silicone can permanently stain the stone. Test on an offcut first.
Metal Trim Options (Optional)
  • U-Shape Trim — panel edge cap; use at exposed panel edges and wall edge terminations
  • T-Shape Trim — panel-to-panel joint; use where a defined joint between panels is desired
  • L-Shape Trim — angle termination; use where stone meets a return at window reveals or door frames
  • Inside Corner Trim — internal 90° corners, alcoves and niches
  • Outside Corner Trim — columns, room corners and external angles
05

SEAL & CURE

Allow the Installation to Cure

  • Protect the installation from movement, moisture, impact, and mechanical load for the full cure period.
  • Don't grout, seal, or load the surface until the adhesive has cured — 24–48 hours is typical, but the manufacturer's instructions take precedence.
  • Extend the cure time in cold or high-humidity conditions.

Inspect and Clean the Surface

  • Inspect every joint, corner, and edge for alignment or lifting before sealing.
  • Clean with water and a lint-free cloth, or a pH-neutral stone cleaner for stubborn residue — avoid acidic, bleach-based, or abrasive products.

Test and Apply the Sealer

  • Test your chosen sealer on an offcut first — it can alter the stone's colour or sheen.
  • Apply the sealer only once the adhesive, joints, and stone are fully cured, clean, and dry.
  • Apply with a short-pile roller, following the manufacturer's instructions for coverage, additional coats, and drying time.
  • Reapply roughly every 18 months, or sooner if you notice protection starting to diminish.
  • Sealer Type
    Recommended Product
    Best For
  • Penetrating / no-gloss
    xxx
    Interior walls — invisible finish
  • Water-based premium
    xxx
    Bathrooms, wet areas
  • Semi-gloss / enhancing
    xx
    Slight sheen or colour deepening
  • Solvent-based — large projects
    xxx
    Exterior facades, large commercial
Need Guidance For Your Installation?
Request Installation Guidance
Button Arrow
Translucent Installation Guide

Stone Veneer Installation Guide

Backlit & Illuminated Applications
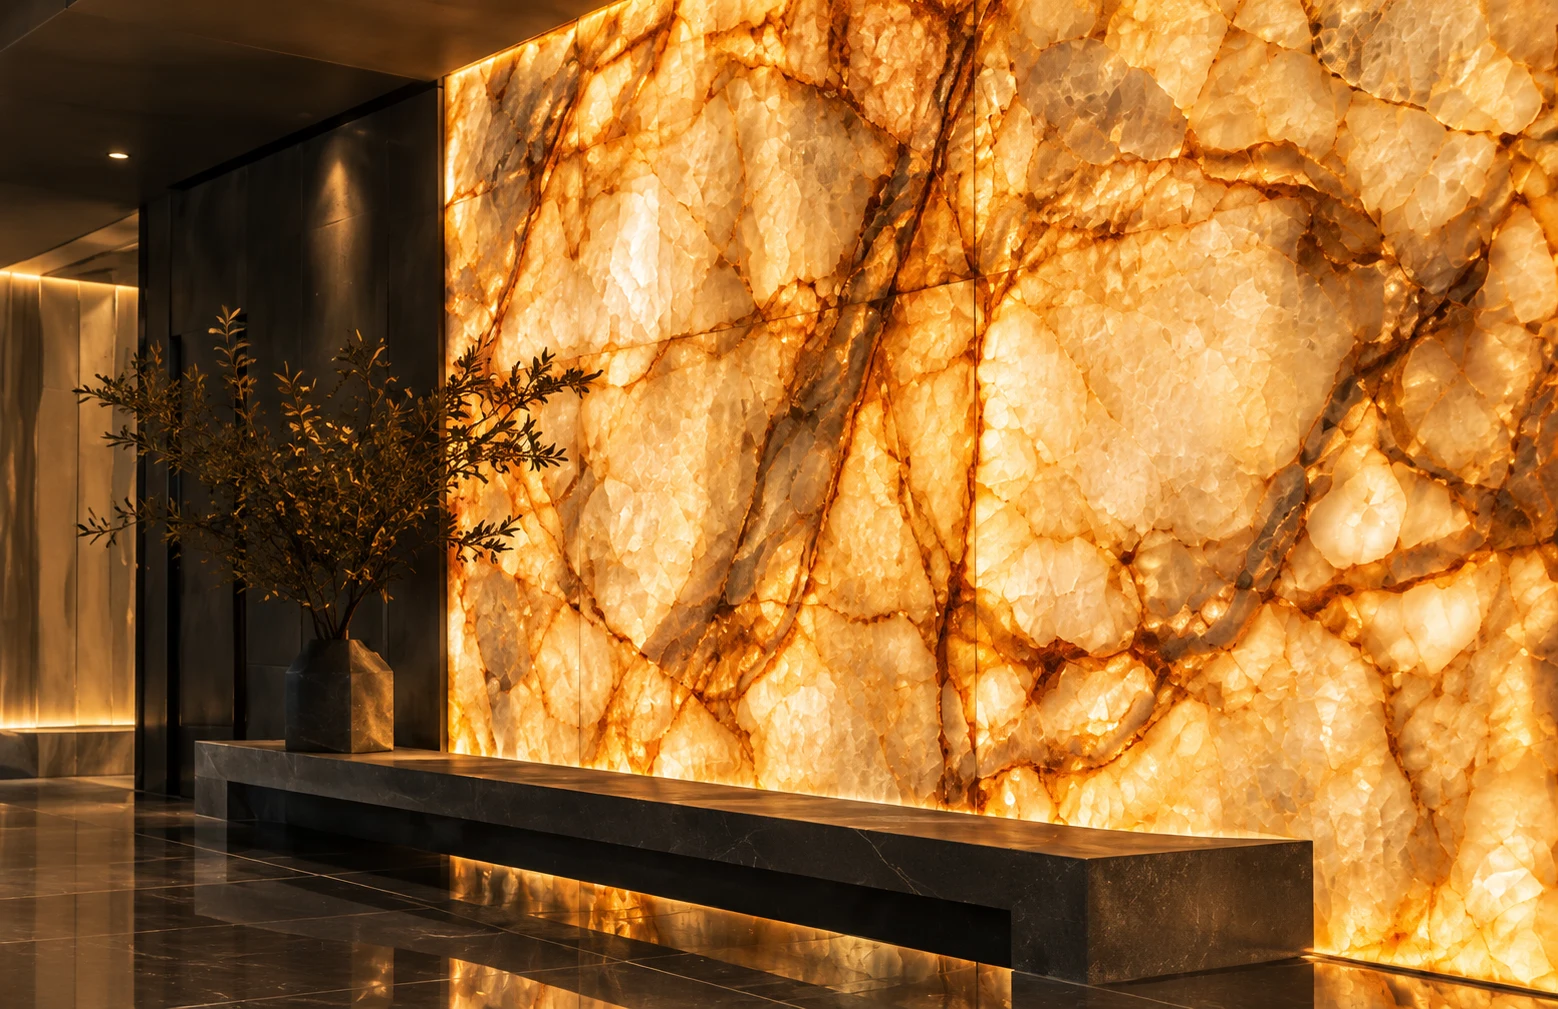
Six phases carry you from building the lighting cavity to the final light test. For a fully custom, made-to-order illuminated panel, see our Backlit Panels program instead of installing raw sheet stock yourself.
01

BUILD THE LIGHTING CAVITY

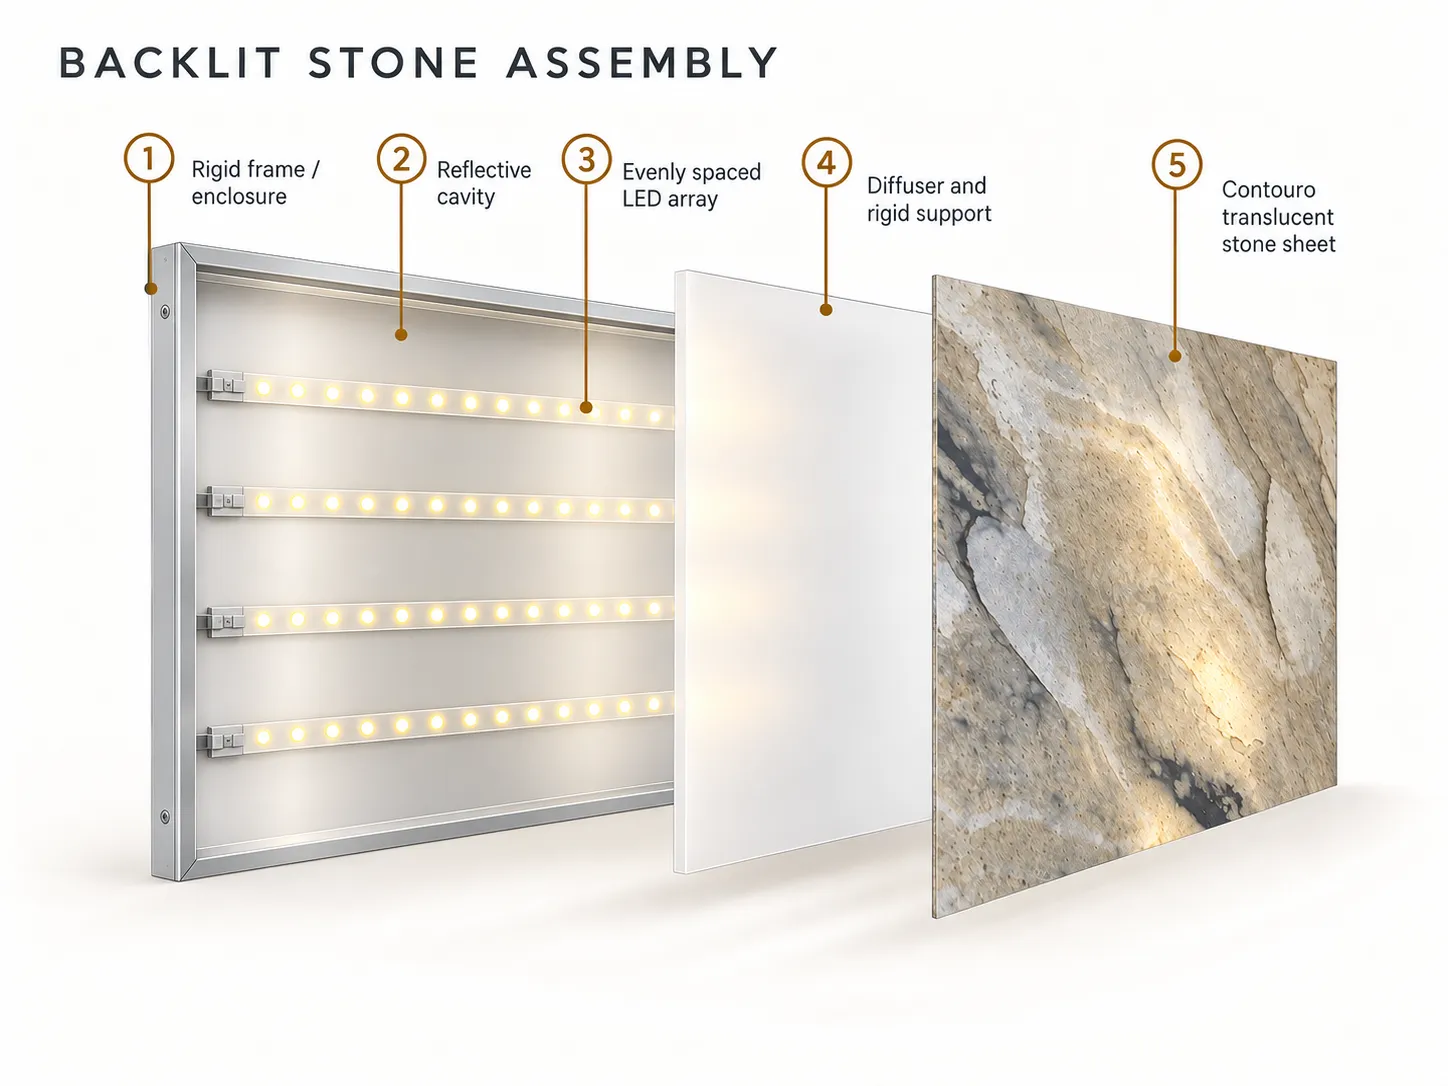
Construct the Frame

  • Build a sturdy, level frame or housing to hold the light source and base layer, and fix it securely to the wall or mounting structure.
  • Size the cavity depth to accommodate your chosen light source plus its required light distance

Choose & Mount the Light Source

  • Standard LED gives focused, bright light — good for highlighting detail but can cause glare. Diffuse LED gives a softer, more uniform glow suited to gentle overall illumination. An adjustable LED offers the most flexibility if you want to fine-tune the effect later.
  • Mount LED strips or panels evenly inside the frame, spacing them to avoid dark gaps or bright hot spots.
  • Connect the LEDs to the power source and check that every section lights up correctly before sealing the cavity.

Choose the Base Layer

  • Bond translucent stone to a rigid base layer — acrylic, plexiglass, Lexan sheet, or tempered glass all work.
  • A frosted or milky finish diffuses light more evenly than clear material and helps hide individual LED points.
  • Backing thickness generally increases with panel size to stay rigid and diffuse evenly — contact our specification team for the confirmed thickness for your format.

Test the Cavity Before Sealing

  • Once every section is lit and working, confirm the layout alignment and check that the overall illumination is even before closing up the cavity.
  • Catching a wiring or spacing problem now is far easier than after the base layer and stone are bonded on top.
Electrical & Lighting Safety
  • All wiring must be installed by a licensed electrician in compliance with local electrical code.
  • Use a driver/transformer rated for the installation environment — a wet-location-rated driver is required for bathrooms, exteriors, or other damp locations.
02

PREPARE SURFACE

Inspect the Sheets on Delivery

  • Inspect every sheet for dimensions, light transmission, and surface condition before cutting or bonding it.
  • Do a layout test first: lay sheets out to see where each one fits best and confirm the sequence, since appearance can shift once light passes through.
  • Hold each sheet up to a light source before cutting — the clearest way to catch anything unusual before it's built into the wall.
  • Variation in light transmission, internal mineral clouding, fine cracks, and slight edge chipping are natural-stone characteristics, not defects.
Inspect Before You Install
  • Report any genuine defect within 14 days of delivery.
  • Once a sheet has been cut or bonded, it's no longer eligible for a quality claim.

Acclimate & Flatten the Sheets

  • If sheets arrive rolled, let them rest in a warm environment or indirect sunlight for a few hours before unrolling — a heat gun may be used with caution if needed.
  • Only unroll between 85°F and 160°F; cracking sounds mean the sheet is too cold.
  • Keep the installation area between 50°F and 95°F (10°C–35°C).

Pre-Seal to Protect the Surface

  • Contouro recommends applying one coat of sealer to the sheets before installation — separate from any final protective treatment — to help protect the surface from fingerprints and handling marks.
  • Wear clean gloves throughout cutting, handling, and installation to avoid transferring oils or fingerprints onto the stone face.

Prepare the Base Layer Surface

  • Make sure the base layer and the reverse face of the stone are both clean, dust-free, and grease-free immediately before bonding.
  • Check the base layer for bumps or irregularities — they'll show through as light or dark patches once illuminated.

Gather Essential Tools

  • Bring together a circular or track saw, light-permeable adhesive, measuring tools, a pencil, and a pressure roller.
03

MEASURE & CUT

Plan the Layout

  • Number the sheets in sequence so light transmission and veining flow the way you want across the finished panel.
  • Plan joints, corners, and edge terminations before you cut anything.

Measure and Mark

  • Measure the desired size on each sheet and mark cut lines on the back only.
  • Double-check measurements before cutting — walls and frames are rarely perfectly square.

Cut the Sheets Safely

  • Cut with a circular or track saw, or a jigsaw, CNC router, laser, or water jet for curves and detailed cut-outs.
  • Use a fine-to-medium tooth blade, cutting from the back of the sheet; wet-cut sheets should dry completely before bonding.
Cutting Safety
  • Wear a P2 mask, safety goggles, gloves, and hearing protection throughout.
04

APPLY ADHESIVE

Select the Adhesive

  • Use a light-permeable adhesive only
  • A clear construction/bonding sealant is sometimes used as an alternative
  • Check the manufacturer's current data sheet for open time, coverage, and curing requirements.

Mask the Edges

  • Mask sheet edges with standard painter's tape, not high-tack, to protect the stone face.
  • Remove tape promptly once each sheet is bonded.

Apply the Adhesive

  • Apply evenly to the back of the sheet or the base layer, using the back-buttering technique for a more uniform bond.
  • Skip the trowel ridges you'd use on standard veneer — smooth coverage avoids shadow-banding once the panel is lit.
  • Avoid trapped air bubbles, which appear as dark patches once backlit.
  • Most light-permeable adhesives have a limited open time — position the sheet promptly once adhesive is applie
Adhesive Selection
  • Confirm against the manufacturer's current data sheet. A non-translucent or opaque adhesive isn't suitable for backlit work.
05

PRESS & BOND

Position and Roll the Sheet

  • Work from the bottom up, checking each sheet with a spirit level.
  • Press firmly from the centre out, then use a pressure roller to enhance adhesion and remove trapped air.
  • A slight reposition is possible while the adhesive is still open.
06

SEAL & CURE

Allow the Installation to Cure

  • Let the adhesive cure before loading the panel or powering the lights — allow up to 24 hours as a starting point, though cold, high humidity, or a different adhesive may call for longer. Always defer to the adhesive manufacturer's instructions.
  • Never power on the lighting system before the adhesive has fully cured.
  • Test the complete lighting setup before calling the installation final — appearance under light often differs substantially from unlit.
Need Guidance For Your Installation?
Explore Custom Backlit Panels
Button Arrow

General Disclaimer

This guide provides general information only. Contouro flexible stone veneer must be installed by a qualified professional experienced in surface material installation. The installer is responsible for confirming that all substrates, tools, adhesives, primers, sealers, and installation methods are appropriate for the specific project, and that they comply with current manufacturer instructions and applicable regulations. All adhesive, substrate, sealer, and tool recommendations on this page are indicative — specific product selection must be verified against the manufacturer's current data sheet. Contouro LLC accepts no liability for installation outcomes, substrate damage, appearance changes, or personal injury resulting from improper preparation, product selection, or installation. For project-specific technical advice, contact our specification team.